I love pigs. Not just because they are cute little animals (especially the teacup ones), but because they are delicious. I can't think of one pork product that I don't like. Bacon. Ham. Porkchops. Pork ribs. Mmmm...nope not one pork product that I don't like!
Last night I thawed out some porkchops, but I wasn't totally sure what I was going to do with them. I thought about maybe a pork stirfry, or just simply grilling them with some season salt, but I wanted something a little more glamorous. Yes, Paleo can be glamorous!
I found a recipe for lamb chops and then tweaked it a little. Here's the result:
Balsamic Porkchops
4 pork chops (bone out, thick cut)
3/4 tsp ground rosemary
1/2 tsp ground thyme
Salt and Pepper to taste
2 Tbls EVOO
1/2 c balsamic vinegar
3/4 c beef broth
1 tsp garlic
1 Tbls butter (optional--depends how strict Paleo you are)
Mix rosemary, thyme, salt, and pepper and sprinkle on both sides of each chop.
In a pan, heat up oil on med-high heat until the oil starts to smoke--if you want a good sear, it MUST be super hot/smoking oil or else the chops will absorb the oil instead of cook. For the thickness of my chops, I seared each side for 5 minutes, which left the middle a very very light pink. If you don't want pink, I suggest going 6-7 minutes on each side.
When the chops are done, take them out and keep them warm in a preheated oven or in the microwave. Add the garlic to the pan and cook for a couple minutes, then add your vinegar and broth. Stir often and simmer until the liquid has reduced by half--it should thicken and be a little sticky.
At this point, you can add the butter if you choose. It's good either way, so don't feel like you have to if you're trying to be strict Paleo here.
I served with steamed cauli and it was delish! H said that the glaze wasn't as flavorful as he'd expected and would prefer A1 but he's a boy, what does he know about glamorous food?! :) I thought it was a great flavor--a little sweet because of the vinegar, but a perfect compliment to the savory! The chops by themselves without the glaze are still really tasty, too. Enjoy!
xoxo, M
Showing posts with label recipe. Show all posts
Tuesday, September 6, 2011
Taco Casserole
H and I love Mexican food. In fact, "love" may not even be a strong enough word to describe it. We have an amazing local Mexican restaurant in town that we go to, usually where we split the fajitas for two (shrimp, chicken, steak, and chorrizo) sans rice and tortillas. But going out to eat can get pricey, so I was super excited to find this recipe and tweak it to fit our needs.
Warning: This isn't strict Paleo. We used some dairy, but you can take that out or cater it to your Paleo needs. The original recipe also has layers of flour tortillas alternated with the casserole, but I omitted that to make it more Paleo-friendly.
Taco Casserole
1-1/2 to 2 lbs lean ground beef (I used 96/04)
Taco Seasoning (1 packet, or your favorite loose seasoning from your local farmers market)
1/8 c diced red onion
2 jalapenos, diced
1 c shredded cheese
2/3 c chunky salsa
Shredded lettuce and sour cream, as needed
In a little bit of olive oil, saute the diced onions, then add the ground beef. Make sure to break up the ground beef while it's cooking. As the beef starts to brown, add your taco seasoning; if you're using the packet kind, follow directions. If you're using the loose kind (like we have), make sure to add about 1/4 c water to 3 Tbls seasoning. .
Simmer the beef over med-high heat until all the beef is cooked and the water has cooked down
Once the beef is cooked, add to your casserole dish with 2/3 cup of the cheese and the jalapenos. Mix well.
Pour the salsa on top of the casserole, then sprinkle the remaining 1/3c cheese on top. Bake at 350 degrees for about 10 minutes--enough to heat everything through and melt the cheese.
I served it with shredded lettuce and sour cream, with a few more jalapenos on top (we like it spicy!)
Go ahead and enjoy!!
xoxo, M
Warning: This isn't strict Paleo. We used some dairy, but you can take that out or cater it to your Paleo needs. The original recipe also has layers of flour tortillas alternated with the casserole, but I omitted that to make it more Paleo-friendly.
Taco Casserole
1-1/2 to 2 lbs lean ground beef (I used 96/04)
Taco Seasoning (1 packet, or your favorite loose seasoning from your local farmers market)
1/8 c diced red onion
2 jalapenos, diced
1 c shredded cheese
2/3 c chunky salsa
Shredded lettuce and sour cream, as needed
In a little bit of olive oil, saute the diced onions, then add the ground beef. Make sure to break up the ground beef while it's cooking. As the beef starts to brown, add your taco seasoning; if you're using the packet kind, follow directions. If you're using the loose kind (like we have), make sure to add about 1/4 c water to 3 Tbls seasoning. .
Simmer the beef over med-high heat until all the beef is cooked and the water has cooked down
Once the beef is cooked, add to your casserole dish with 2/3 cup of the cheese and the jalapenos. Mix well.
Pour the salsa on top of the casserole, then sprinkle the remaining 1/3c cheese on top. Bake at 350 degrees for about 10 minutes--enough to heat everything through and melt the cheese.
I served it with shredded lettuce and sour cream, with a few more jalapenos on top (we like it spicy!)
Go ahead and enjoy!!
xoxo, M
Monday, August 15, 2011
My Arms and the Army
Yesterday was the first real day back in the gym in a long time. Yes, we did go to the gym on August 1, but that was 2 weeks ago! Ugh, I feel gross. I hate going that long without hitting the gym. I ran a couple laps on the track, and that seriously made my chest burn---key indicators that my body is mad at me because I haven't run lately. H had me focus on my arms, back, and chest because it's been so long and I still have a dream to be able to do a full, properly formed dip before summer is over. After lots of lat pulls, tricep pulls, tricep extensions, chest presses, bench presses, shruggs, and dips (with higher weights than normal on all of them, and new forms on the dips), I decided that just wasn't enough so I hopped onto the leg press and instead of starting at 70lbs and working up to 85lbs, I started at 85lbs and worked up to 115lbs.
Needless to say, I woke up barely able to move my upper body and arms. :)
Gosh I love that feelling!
You know how I know I'm sick and twisted? I can't wait to go back today! Our community center gym is closed all week for maintenance, so we get to use the gym at our local University for free---totally okay with us, because they have free weights and barbells, which our community center gym does not. Round 2 starts today!
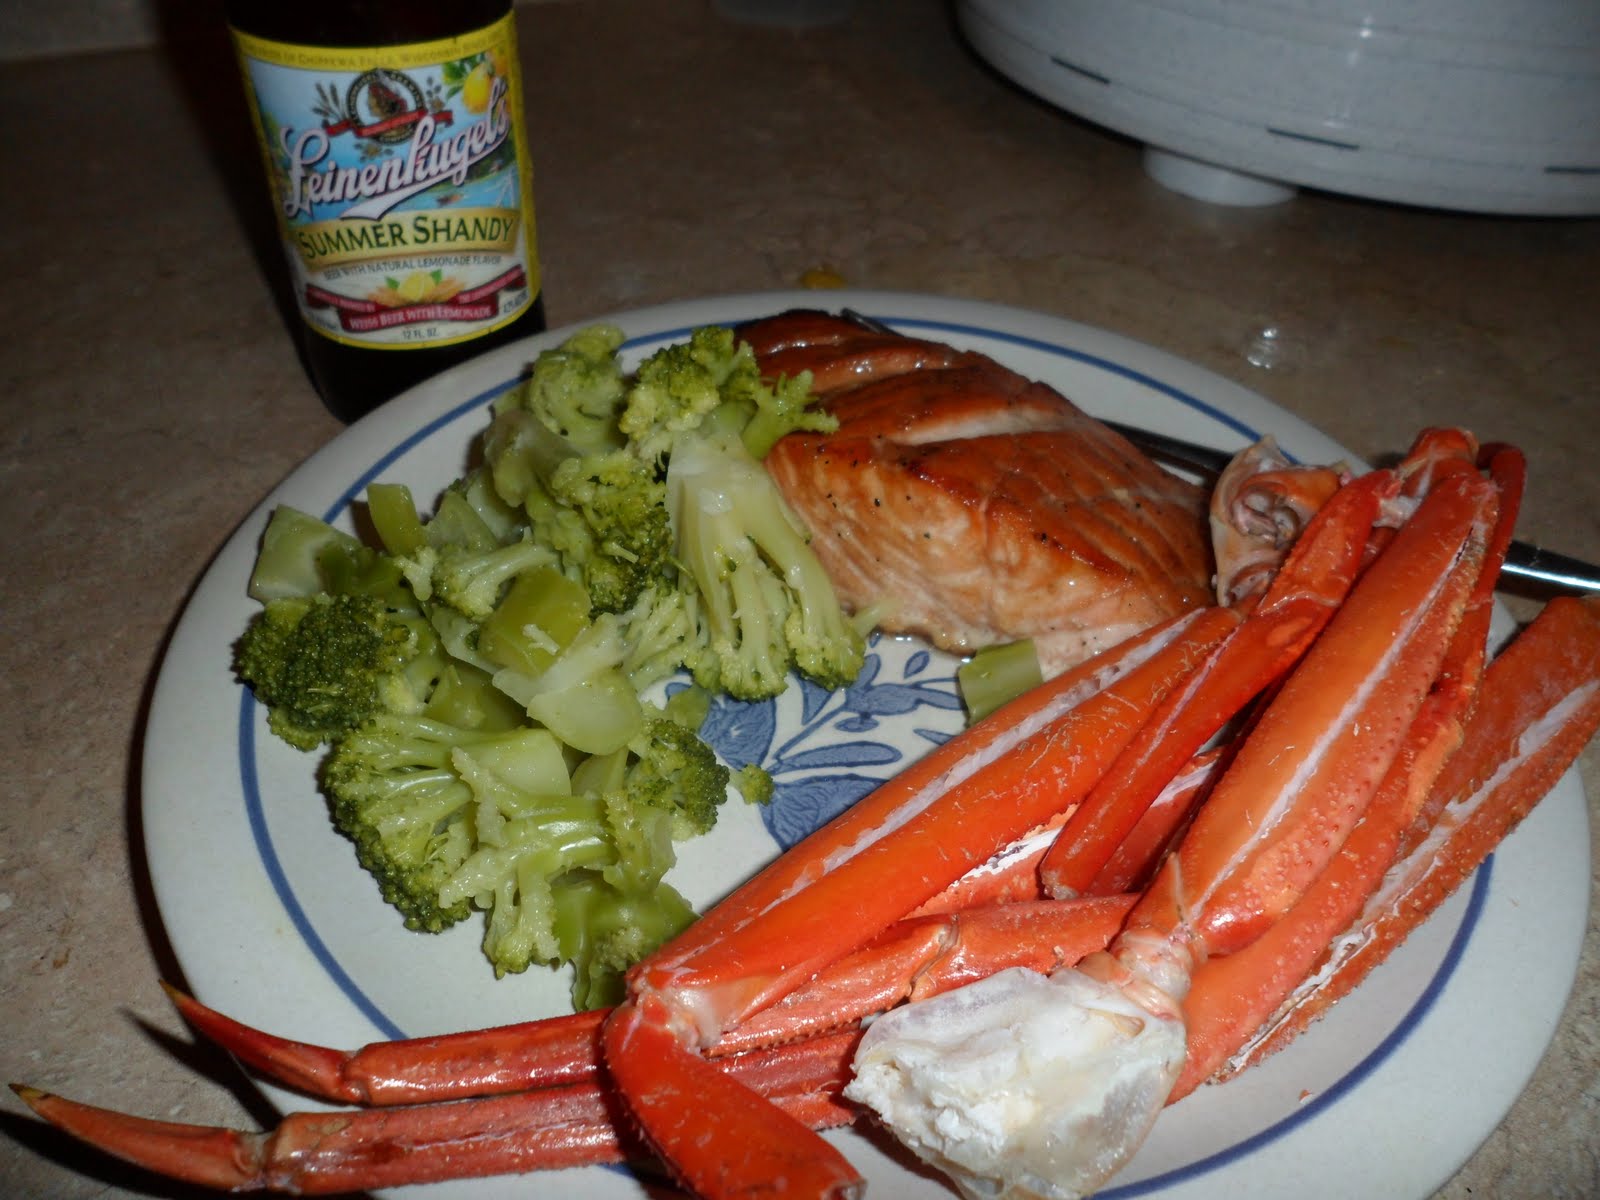
In other news, to help H celebrate finally signing his Army contract, I made him an awesome dinner! Cedar plank salmon, roasted crab legs, and broccoli! Check out the recipes and try it for yourself--we paired it with Leinenkugel Summer Shandy and it was a perfect celebration dinner!! Yum!
xoxo, M
Needless to say, I woke up barely able to move my upper body and arms. :)
Gosh I love that feelling!
You know how I know I'm sick and twisted? I can't wait to go back today! Our community center gym is closed all week for maintenance, so we get to use the gym at our local University for free---totally okay with us, because they have free weights and barbells, which our community center gym does not. Round 2 starts today!
In other news, to help H celebrate finally signing his Army contract, I made him an awesome dinner! Cedar plank salmon, roasted crab legs, and broccoli! Check out the recipes and try it for yourself--we paired it with Leinenkugel Summer Shandy and it was a perfect celebration dinner!! Yum!
xoxo, M
Cedar Plank Salmon and Roasted Crab Legs
Had to help H celebrate signing his contract and swearing into the Army, so a delicious, (mostly) Paleo-friendly seafood feast was in order!
It was really simple to make, and soooo good!
Honey-Balsamic Cedar Plank Salmon
4 salmon fillets (preferably fresh from the seafood section, not the frozen food section)
1 Tbl salt
1/2 tsp pepper
1/2 tsp dry mustard
1/2 c honey
1/4 c balsamic vinegar
2 Untreated cedar planks (VERY IMPORTANT that they are UNtreated)
Olive oil
Soak the planks in water for 2 hours minimum to prevent burning or fire.
Turn on the broiler. Put planks 5 inches under the broiler for 3-5 minutes, until wood starts to brown but not burn. Use tongs and remove the planks from the broiler. Turn oven to 400*. Immediately oil the planks with olive oil, then lay salmon fillets skin-side down on the planks (2 fillet per plank).
Cut 4-6 small slits in the salmon flesh down the length of each fillet to give places for the glaze to sink into. Mix salt, pepper, and mustard in a bowl. Sprinkle mix over top of salmon fillets (not the skin-side). Put honey in a glass bowl and heat for 30 seconds to make it a little more liquidy. Mix in balsamic vinegar, then baste over salmon fillets. Make sure to reserve half of the liquid to baste half-way through cooking.
Put the planks into the oven (with a cookie sheet on the shelf below to catch any runoff) and bake for 10 minutes. Baste the salmon, then bake until cooked to your liking. We did another 10 minutes and it was perfect for how thick our fillets were.
It was really simple to make, and soooo good!
Honey-Balsamic Cedar Plank Salmon
4 salmon fillets (preferably fresh from the seafood section, not the frozen food section)
1 Tbl salt
1/2 tsp pepper
1/2 tsp dry mustard
1/2 c honey
1/4 c balsamic vinegar
2 Untreated cedar planks (VERY IMPORTANT that they are UNtreated)
Olive oil
Soak the planks in water for 2 hours minimum to prevent burning or fire.
Turn on the broiler. Put planks 5 inches under the broiler for 3-5 minutes, until wood starts to brown but not burn. Use tongs and remove the planks from the broiler. Turn oven to 400*. Immediately oil the planks with olive oil, then lay salmon fillets skin-side down on the planks (2 fillet per plank).
Cut 4-6 small slits in the salmon flesh down the length of each fillet to give places for the glaze to sink into. Mix salt, pepper, and mustard in a bowl. Sprinkle mix over top of salmon fillets (not the skin-side). Put honey in a glass bowl and heat for 30 seconds to make it a little more liquidy. Mix in balsamic vinegar, then baste over salmon fillets. Make sure to reserve half of the liquid to baste half-way through cooking.
Put the planks into the oven (with a cookie sheet on the shelf below to catch any runoff) and bake for 10 minutes. Baste the salmon, then bake until cooked to your liking. We did another 10 minutes and it was perfect for how thick our fillets were.
Fresh salmon fillets.
Seasoned and basted salmon on the pre-baked cedar planks.
The final product: delicious!!
We also did roasted crab legs, but that just consisted of taking the crab legs out of the bag, wrapping the shoulders in foil, and baking on a cookie sheet for 10 minutes--that barely counts as cooking lol!
A perfect celebration dinner! (Especially paired with some Summer Shandy!!!)
Wednesday, July 27, 2011
Paleo Egg Cups
I know it's been too long since I've posted about Paleo or Crossfit, but to be honest...we haven't done anything too exciting with Paleo or Crossfit lately. We've had a lot of visits from friends/family, and sometimes that makes it really hard stay on-track. Needless to say, we've been eating Paleo probably 50/50 lately, which is not something we are proud of or happy about. So today is our focus back into Paleo. We're stocked up on meat like crazy, and we're going to get more veggies today. Plus, thanks to Bergman's Market in Port Clinton, Ohio (most amazing local farmer's market/grocers EVER) we have the juiciest, sweetest Georgia peaches in the entire world (well, okay, except for maybe in Georgia...)
So this morning, on our way back to a 90/10 Paleo lifestyle, I made something fun for breakfast. I've never made them before, but I've heard about them and a friend of mine has made them in the past that were very yummy, so I decided to play around this morning. These are my Paleo Eggy/Omelet Cups!
Fairly quick and easy to make, plus they are adorable and kids tend to love them. They reheat very well, too, which is good for leftovers.
Eggy/Omelet Cups
6 strips of bacon
6 eggs
1/2 cup green pepper, diced (for the ones we made)
1/2 cup any other veggies/meat that you like in your omelet--get crazy!
Salt & pepper to taste
Cooking spray
Cook bacon until it is cooked but not crispy. You're going to need to bend this bacon in a circle, so you want it to be cooked but bendy.
Spray a muffin pan with non-stick cooking spray--seriously, don't skip this step or you'll be sorry!
Bend bacon around the inside of the muffin tin, almost like you're lining the sides of each muffin cup with it. The bacon will probably overlap, and that's totally okay.
If you want to make omelet cups, crack your eggs into a bowl, add a little water, and mix like you're making scrambled eggs. Then pour the egg mixture into each muffin cup, filling it to just below the top lip of the cup. If you want to make regular ones, crack one egg directly into each muffin cup.
Add your veggies/meat now. We just did green peppers because we're running low on veggies, but other things you might want to add include:
-Mushrooms
-Colored peppers
-Tomatoes
-Onions
-Spinach
-Broccoli
-Chunks of ham
-Chorizo or other sausage
-More crumbled bacon
-Cheese (if you're straying a little from strict Paleo)
Season with salt and pepper to taste.
Oven at 350*
Bake for 12 minutes if you want a runny yolk in the regular cups.
Bake for 15 minutes if you want a cooked yolk in the regular cups.
Bake for 15 minutes for the omelet cups.
Here's our omelet cups (on the left) and our regular cups (on the right). They turned out SO GOOD! I only made 6, like the recipe says to do, but in the future I'll make more so we can reheat them for leftovers throughout the day. Yay for mini omelet/eggy cups!
xoxo, M
Sunday, June 26, 2011
Updates and Experiments
Alright. I am 5 weeks in officially today.
I am down 15lbs total.
I have lost 4 inches off my waist.
Most of my stomach problems have gone away.
I have a ton more energy.
I can tell I'm getting stronger, and I can even see my muscles developing.
I'm recovering faster after workouts, and I can workout longer and run longer without getting as winded.
My calluses are getting bigger (yay inspiration!)
Overall, after 5 weeks of Paleo and working out/lifting/CrossFit, I am officially obsessed with this new lifestyle and I can't believe I didn't do it sooner! Before I started all of this, I bought a really adorable bikini that I want to fit into. I put it on, took pics (no, I will not show them to you--they are scary, and I don't want to have it come back and bite me in the butt when you want compensation for your therapy bills because of what you saw) then hung the pics in the kitchen. Yesterday, H made me put the bikini back on, which has been happily living hanging on my dresser mirror, and retake my pics. There is definitely a difference! I'm by no means ready to wear that thing to a public beach (oh God, could you imagine the therapy bills?!) but I'm proud that it fit better yesterday than it did 2 months ago. Yay progress!
I've been doing some experimenting in the kitchen, too!
I made some awesome roasted broccoli (it gives it a nuttier taste, and is very yummy!) and a tasty easy roast pork loin, and yesterday I made Paleo-friendly mayo so I could make egg salad today. So far, all 3 experiments (which is what H likes to call them...) turned out great and I'm really impressed with myself.
As for working out, we'll have a lot more time for that now. H will be leaving for the military a little sooner than expected, and we've been really buckling down on working out to get him into the right shape to get into the program he wants. While it means he'll be leaving me a little sooner than planned (and therefore I must be down in size a little sooner than planned so I can fit into a size 8 wedding dress!) I'm excited for his adventure and show him how much progress I'm going to make while he's gone for 17 weeks at OSUT and Airborne School--he's going to come home and I'm going to be out-of-control-sexy-strong! ;)
I've had a lot of people asking about what I eat with Paleo and how it works, and I think the greatest place to see what to eat is Rob's Quick Start Guide and the best place to see why I eat Paleo and how it works is Fitbomb's explanation. If you're interested in trying out Paleo, even just for a couple weeks to see how it works, these are 2 great resources to get you started.
I am down 15lbs total.
I have lost 4 inches off my waist.
Most of my stomach problems have gone away.
I have a ton more energy.
I can tell I'm getting stronger, and I can even see my muscles developing.
I'm recovering faster after workouts, and I can workout longer and run longer without getting as winded.
My calluses are getting bigger (yay inspiration!)
Overall, after 5 weeks of Paleo and working out/lifting/CrossFit, I am officially obsessed with this new lifestyle and I can't believe I didn't do it sooner! Before I started all of this, I bought a really adorable bikini that I want to fit into. I put it on, took pics (no, I will not show them to you--they are scary, and I don't want to have it come back and bite me in the butt when you want compensation for your therapy bills because of what you saw) then hung the pics in the kitchen. Yesterday, H made me put the bikini back on, which has been happily living hanging on my dresser mirror, and retake my pics. There is definitely a difference! I'm by no means ready to wear that thing to a public beach (oh God, could you imagine the therapy bills?!) but I'm proud that it fit better yesterday than it did 2 months ago. Yay progress!
I've been doing some experimenting in the kitchen, too!
I made some awesome roasted broccoli (it gives it a nuttier taste, and is very yummy!) and a tasty easy roast pork loin, and yesterday I made Paleo-friendly mayo so I could make egg salad today. So far, all 3 experiments (which is what H likes to call them...) turned out great and I'm really impressed with myself.
As for working out, we'll have a lot more time for that now. H will be leaving for the military a little sooner than expected, and we've been really buckling down on working out to get him into the right shape to get into the program he wants. While it means he'll be leaving me a little sooner than planned (and therefore I must be down in size a little sooner than planned so I can fit into a size 8 wedding dress!) I'm excited for his adventure and show him how much progress I'm going to make while he's gone for 17 weeks at OSUT and Airborne School--he's going to come home and I'm going to be out-of-control-sexy-strong! ;)
I've had a lot of people asking about what I eat with Paleo and how it works, and I think the greatest place to see what to eat is Rob's Quick Start Guide and the best place to see why I eat Paleo and how it works is Fitbomb's explanation. If you're interested in trying out Paleo, even just for a couple weeks to see how it works, these are 2 great resources to get you started.
Easy Pork Loin Roast
Often, our local Meijer puts their pork loins on sale, which is great because we can eat off of that for a few days. Check your stores and sale flyers, and stock up on these. They create quick and easy Paleo meals--but be warned!: You MUST trim off the extra fat from your loin. You may want to leave a little on for flavor and good animal fats, but pork loins usually have a whole slab of fat on the bottom and you probably want to take most of that off.
I did mine in a crock-pot because it's easiest, but this can be done in the oven--see the note at the bottom of this page.
Pork Loin Roast
1 large pork loin (we usually get one that is 3-5 lbs)
EVOO
Ground rosemary
Garlic powder
Salt and pepper
Cut the fat slab off the pork loin to make it a leaner cut. You may also have to cut your pork loin in half to make it fit in your crock pot or roasting pan.
Drizzle the pork loin with EVOO and rub the oil into the loin. Generously sprinkle the loin with ground rosemary, garlic, salt, and pepper, then pat it into the loin to make sure it's coated (don't rub, pat...like a wine stain on your white carpet)
Place the loin into the crockpot (we had to wedge the loin in to make it fit, even after cutting it) and put about 1/3 cup of water at the bottom of the pot. You could put veggies like carrots, celery, onions, etc. in at this point, but we did it just as-is.
**If you want to cook this in a roasting pan in the oven, you need to put the water on the bottom of the pan. Then you want to either put in a small cooking rack or use veggies to keep the roast off the bottom of the roasting pan. Cover the pan with foil and seal around the edges to keep the moisture in--this will make sure your roast doesn't dry out. Cook it at 300 degrees for 5 to 6 hours. The roast should be white (NO PINK!) all the way through when you cut it open**
Cook the roast in the crock pot on low for 2 hours, then on high for 1 1/2 hours. The roast should be white (NO PINK!) all the way through when you cut it open.
This goes great with roasted broccoli or a nice salad.
Enjoy!
xoxo, M
I did mine in a crock-pot because it's easiest, but this can be done in the oven--see the note at the bottom of this page.
Pork Loin Roast
1 large pork loin (we usually get one that is 3-5 lbs)
EVOO
Ground rosemary
Garlic powder
Salt and pepper
Cut the fat slab off the pork loin to make it a leaner cut. You may also have to cut your pork loin in half to make it fit in your crock pot or roasting pan.
Drizzle the pork loin with EVOO and rub the oil into the loin. Generously sprinkle the loin with ground rosemary, garlic, salt, and pepper, then pat it into the loin to make sure it's coated (don't rub, pat...like a wine stain on your white carpet)
Place the loin into the crockpot (we had to wedge the loin in to make it fit, even after cutting it) and put about 1/3 cup of water at the bottom of the pot. You could put veggies like carrots, celery, onions, etc. in at this point, but we did it just as-is.
**If you want to cook this in a roasting pan in the oven, you need to put the water on the bottom of the pan. Then you want to either put in a small cooking rack or use veggies to keep the roast off the bottom of the roasting pan. Cover the pan with foil and seal around the edges to keep the moisture in--this will make sure your roast doesn't dry out. Cook it at 300 degrees for 5 to 6 hours. The roast should be white (NO PINK!) all the way through when you cut it open**
Cook the roast in the crock pot on low for 2 hours, then on high for 1 1/2 hours. The roast should be white (NO PINK!) all the way through when you cut it open.
This goes great with roasted broccoli or a nice salad.
Enjoy!
xoxo, M
Roasted Broccoli
Broccoli tastes a little different depending on how you cook it, whether it's steam it fresh, boil it from a frozen bag, or roast it in the oven. This was my first time roasting it, and it turned out quite yummy!
It's really simple to make, and it goes with pretty much anything. I got the idea of it from Nom Nom Paleo Roasted Broccoli & Bacon, but I tweaked it a little and didn't use any bacon (although that would be yummy...hmmm I'll be trying that next).
Roasted Broccoli
2 crowns of fresh (uncooked) broccoli
2 Tbl EVOO
Sea salt
Pepper
Garlic powder
Cut up the broccoli crowns and stems and place them into a gal-sized Ziplock bag. Add the EVOO and sprinkle in the garlic powder to taste (I used a very small amount because we like just a hint of garlic, but you decided what you like). Now shake it up! No seriously...shake the bag. Make sure each pieve of broccoli is coated with some oil and garlic.
I let it sit overnight in the fridge.
Take a baking sheet and cover it with foil, then spread the broccoli out on the foil. Sprinkle the salt and pepper on the broccoli. Place it in an oven pre-heated to 400 degrees and bake for 35 minutes.
At 35 minutes in the oven, the broccoli with still be a little chewy, but if you hate mushy broccoli then 35 minutes will be good for you. If you like your broccoli a little softer, then you may want to go for 40 minutes. Yes, the broccoli will be browned in some spots--that adds flavor, so don't worry, it should look like that.
Enjoy!
xoxo, M
It's really simple to make, and it goes with pretty much anything. I got the idea of it from Nom Nom Paleo Roasted Broccoli & Bacon, but I tweaked it a little and didn't use any bacon (although that would be yummy...hmmm I'll be trying that next).
Roasted Broccoli
2 crowns of fresh (uncooked) broccoli
2 Tbl EVOO
Sea salt
Pepper
Garlic powder
Cut up the broccoli crowns and stems and place them into a gal-sized Ziplock bag. Add the EVOO and sprinkle in the garlic powder to taste (I used a very small amount because we like just a hint of garlic, but you decided what you like). Now shake it up! No seriously...shake the bag. Make sure each pieve of broccoli is coated with some oil and garlic.
I let it sit overnight in the fridge.
Take a baking sheet and cover it with foil, then spread the broccoli out on the foil. Sprinkle the salt and pepper on the broccoli. Place it in an oven pre-heated to 400 degrees and bake for 35 minutes.
At 35 minutes in the oven, the broccoli with still be a little chewy, but if you hate mushy broccoli then 35 minutes will be good for you. If you like your broccoli a little softer, then you may want to go for 40 minutes. Yes, the broccoli will be browned in some spots--that adds flavor, so don't worry, it should look like that.
Enjoy!
xoxo, M
Wednesday, June 15, 2011
Easy Frittata!
I have been driving H crazy about making a frittata for like 2 weeks now, ever since I saw it on Nom Nom Paleo. Seriously, I think he's probably heard the word "frittata" more in the past 15 days than any other word. Tonight, I finally got the ingredients to make my own version of Nom Nom's frittata. Enjoy!
Easy Frittata
6 eggs
1/2 c plain Greek yogurt
1/4 c diced peppers
1/4 c diced ham/bacon/pork/steak/whatever
1 c fresh spinach
1 Tbls EVOO
1/4 tsp minced garlic
In a cast iron skillet, heat the EVOO and the garlic, then add the peppers and meat. Cook for 3-4 minutes.
xoxo, M
Easy Frittata
6 eggs
1/2 c plain Greek yogurt
1/4 c diced peppers
1/4 c diced ham/bacon/pork/steak/whatever
1 c fresh spinach
1 Tbls EVOO
1/4 tsp minced garlic
In a cast iron skillet, heat the EVOO and the garlic, then add the peppers and meat. Cook for 3-4 minutes.
While that's cooking, mix eggs and yogurt until creamy (the yogurt makes the final product fluffy and delicious, trust me)
Once the ham and peppers have cooked down a bit, add the spinach and wilt slightly, turning often. This usually only takes about 2-4 minutes. Be careful not to overcook it--you don't want it totally wilted, just slightly.
Make sure spinach, peppers, and meat cover the bottom of the pan evenly. Then slowly pour the egg mix over it and cook over medium heat for about 5 minutes, just to cook the bottom of the frittata.
Place in oven (preheated to 350 degrees) for 20 minutes. Final product should bounce back when center is gently pressed.
xoxo, M
Tuesday, June 14, 2011
Mmmmeatballs
Mmmmmeatballs! Such an easy recipe, and it has H's stamp of approval, so it's gotta be at least decent ;)
1 lb very lean ground beef OR 1/2 lb very lean ground beef and 1/2 lb lean turkey sausage
1 egg
1/4 c finely chopped red bell pepper
1/4 c finely chopped white onion
1 Tbl minced garlic
1/2 Tbl dried Italian seasonings
1/3 c ground flax seed
1/2 tsp dried red pepper flakes (the spicy ones)
2 Tbl coconut oil or EVOO
2 cups of Tasty Tomato Sauce or any other Paleo-friendly tomato sauce
Mix meat, egg, pepper, onion, garlic, seasonings, flax, and red pepper flakes together in a bowl
Don't be afraid to get your hands messy! (H made fun of me for making him take this picture...)
Once it's all mixed, roll balls into 2-bite-sized meatballs. I use a melon-baller to get them just the right size. My hand is in this pic so you can get an idea of how big I make mine. Remember--the bigger you make them, the longer they need to cook.
I put them in the freezer for about 10 minutes, just long enough for the meat to set up so they don't fall apart in the pan. Don't let them freeze, though! (note: You can freeze them at this point to thaw and cook later) Pour coconut oil or EVOO into a pan and heat until it's just starting to smoke. I also add a little minced garlic to the pan to flavor the oil before cooking, just be careful not to let it burn. Sear the meatballs on each side until just browned--don't burn them (because they are small, they will burn easy so watch them carefully).
Pour a little sauce in the bottom of the pan, then add meatballs and rest of sauce to cover.
Cover with foil and bake at 400 degrees for 20 minutes. If you make your meatballs bigger, you'll want to cook them longer.
xoxo, M
1 lb very lean ground beef OR 1/2 lb very lean ground beef and 1/2 lb lean turkey sausage
1 egg
1/4 c finely chopped red bell pepper
1/4 c finely chopped white onion
1 Tbl minced garlic
1/2 Tbl dried Italian seasonings
1/3 c ground flax seed
1/2 tsp dried red pepper flakes (the spicy ones)
2 Tbl coconut oil or EVOO
2 cups of Tasty Tomato Sauce or any other Paleo-friendly tomato sauce
Mix meat, egg, pepper, onion, garlic, seasonings, flax, and red pepper flakes together in a bowl
Don't be afraid to get your hands messy! (H made fun of me for making him take this picture...)
Once it's all mixed, roll balls into 2-bite-sized meatballs. I use a melon-baller to get them just the right size. My hand is in this pic so you can get an idea of how big I make mine. Remember--the bigger you make them, the longer they need to cook.
I put them in the freezer for about 10 minutes, just long enough for the meat to set up so they don't fall apart in the pan. Don't let them freeze, though! (note: You can freeze them at this point to thaw and cook later) Pour coconut oil or EVOO into a pan and heat until it's just starting to smoke. I also add a little minced garlic to the pan to flavor the oil before cooking, just be careful not to let it burn. Sear the meatballs on each side until just browned--don't burn them (because they are small, they will burn easy so watch them carefully).
Pour a little sauce in the bottom of the pan, then add meatballs and rest of sauce to cover.
Cover with foil and bake at 400 degrees for 20 minutes. If you make your meatballs bigger, you'll want to cook them longer.
xoxo, M
Monday, June 6, 2011
Cooking
I love to cook. Seriously. That's probably what got me into such bad shape...I love to cook and bake, and then I love to eat what I've cooked and baked. And while I would think I was being healthy, I really wasn't so much. No bueno for the waistline.
But I'm finding so many different yummy Paleo recipes! I took a notebook and started writing down the good-sounding ones so I can have my own Paleo cookbook. It makes me happy :) (hey, gotta enjoy the little things in life)
Tonight's menu: Ginger Citrus Roast Chicken ala PaleoDietLifestyle. My intention was to take pics while making it, but I made it in a hurry before work and set it up to marinade in the fridge all day so I can just put it in the oven when I get home, then run to the gym while it cooks. It seriously took like 15 minutes to make:
-Zest 1 lime and 1 orange
-Mix zest with 1 Tbl grated fresh ginger
-Put mix inside cavity of a roasting chicken (Yes, you have to put your hand in the chicken's butt. Get over it. Nobody said Paleo was pretty.)
-Cut zested lime and orange into 8 pieces each and place inside the cavity
-Cut up 2 limes and 1 orange into 8 pieces each and place around/under chicken in roasting pan
-Juice 1 lime and 1 orange into dish with 2 Tbl grated fresh ginger, 1 Tbl EVOO, and a sprinkle of salt
-Roast chicken in oven, basting with juice/ginger/oil mix (figure 20 minutes for each pound of chicken)
I'll post a pic later of the chicken pre-oven and post-oven, as well as letting you know what H and I thought of the final product. Stay tuned!
xoxo, M
But I'm finding so many different yummy Paleo recipes! I took a notebook and started writing down the good-sounding ones so I can have my own Paleo cookbook. It makes me happy :) (hey, gotta enjoy the little things in life)
Tonight's menu: Ginger Citrus Roast Chicken ala PaleoDietLifestyle. My intention was to take pics while making it, but I made it in a hurry before work and set it up to marinade in the fridge all day so I can just put it in the oven when I get home, then run to the gym while it cooks. It seriously took like 15 minutes to make:
-Zest 1 lime and 1 orange
-Mix zest with 1 Tbl grated fresh ginger
-Put mix inside cavity of a roasting chicken (Yes, you have to put your hand in the chicken's butt. Get over it. Nobody said Paleo was pretty.)
-Cut zested lime and orange into 8 pieces each and place inside the cavity
-Cut up 2 limes and 1 orange into 8 pieces each and place around/under chicken in roasting pan
-Juice 1 lime and 1 orange into dish with 2 Tbl grated fresh ginger, 1 Tbl EVOO, and a sprinkle of salt
-Roast chicken in oven, basting with juice/ginger/oil mix (figure 20 minutes for each pound of chicken)
I'll post a pic later of the chicken pre-oven and post-oven, as well as letting you know what H and I thought of the final product. Stay tuned!
xoxo, M
Subscribe to:
Posts (Atom)